Imagine being able to place ads for the product a user just viewed on your website on your visitors Facebook newsfeed. It’s an incredibly powerful marketing tools that is generating unbelievable returns for the smartest advertisers.
Having a list of Facebook users who visit your site is just the start of what’s possible. Adwords search can only respond to searches, it cannot create demand. But Facebook can create demand for your products. You can find out the demographic profile, behaviour pattern and income profiles of your customers and then use this data to let Facebook find you even more customers.
This eye opening advertising tool starts with creating your Facebook pixel.
It’s the Big Brother for internet marketers.
John Langley – Click Convert
What is a Facebook Pixel
A Facebook Pixel is a JavaScript code generated for your website in order to allow you to measure, optimise and build audiences for your ad campaigns.
This code enables you to see the actions people take on your website, ultimately allowing you to see information such as what device has been used. This information is then fed to Facebook for more effective advertising campaigns.
This code will allow you to do the following:
Measure cross-device conversions: This is useful to see how your customers are moving between devices.
Optimise delivery: Make sure your ads are being seen by the people more likely to take the action you want them to take.
Automatically build audiences to retarget: Create Custom Audiences for people who take specific actions on your website.
How to Create a Facebook Pixel
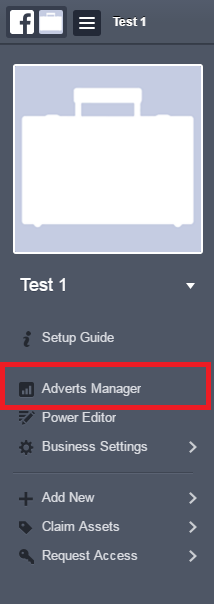
I. Creating a Facebook Pixel is fairly easy and straight forward. All you have to do is login to your Business Manager and click on your “Adverts Manager” on the left hand side.
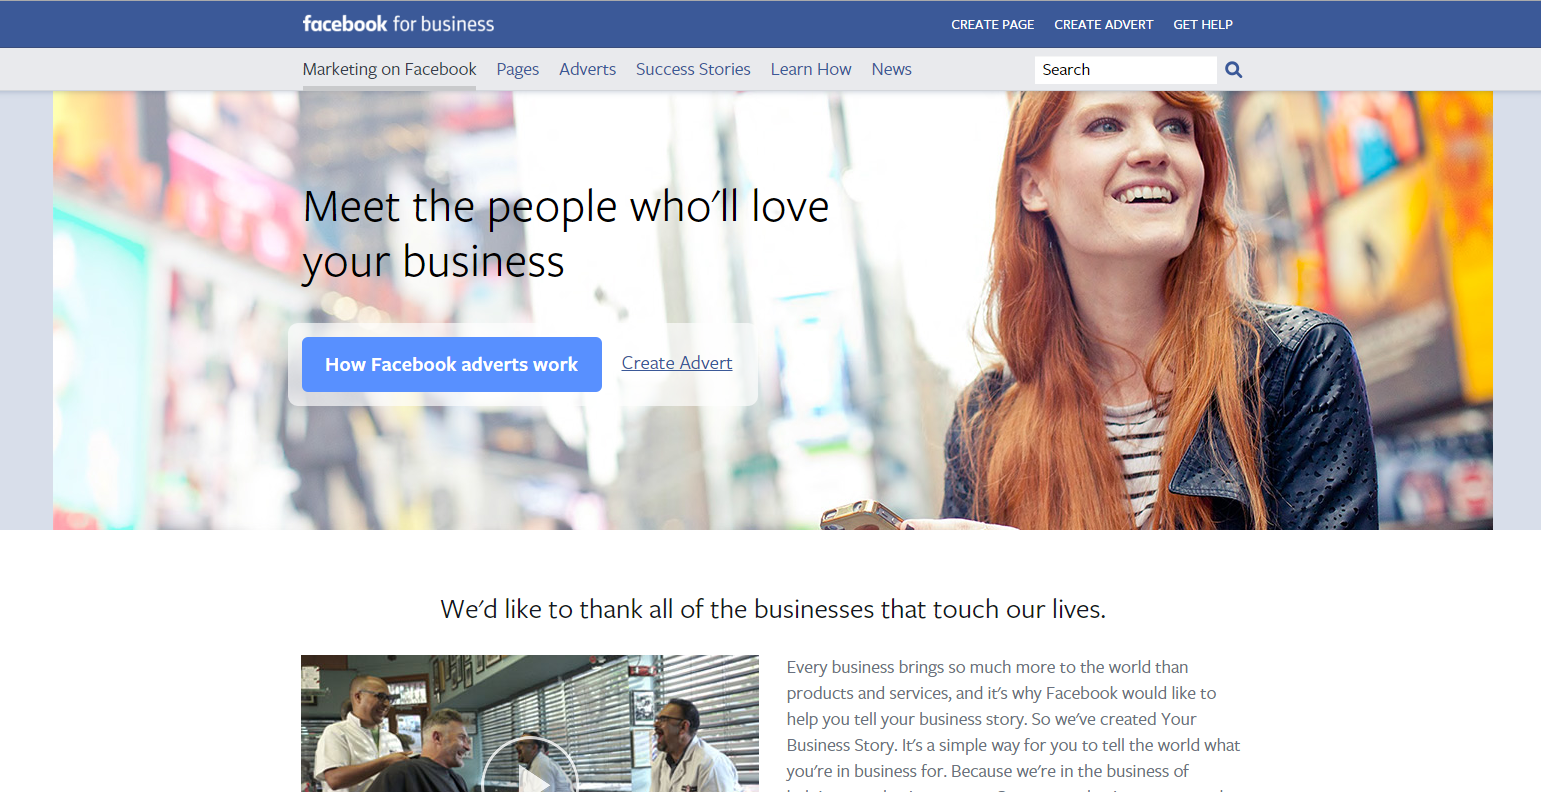
(Please note, if when you have clicked on your Adverts Manager you got taken to the following screen, this means that there is nobody added to manage the Advert Account. In order to be able to create a pixel you need to add someone to manage this account.)
II. If instead you have been taken to this screen then skip to step VIII – “Adverts Manager” home screen.
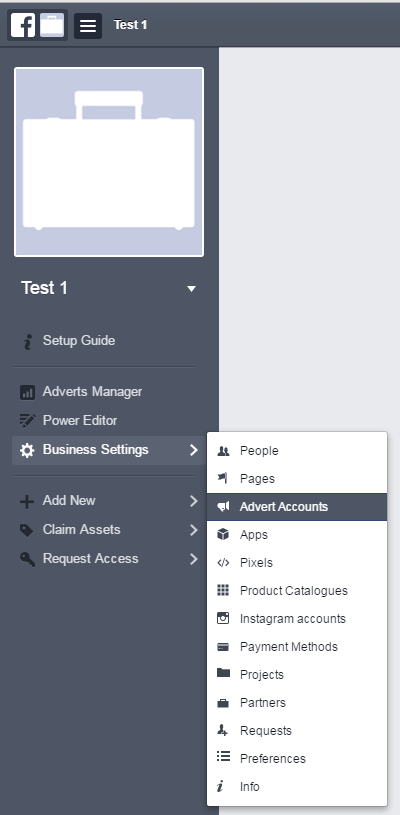
III. To add people to manage your Advert account go to your Business Manager home screen and click on “Business Settings” and then “Advert Accounts
IV. Now click on the blue button “Add Advert Account”.
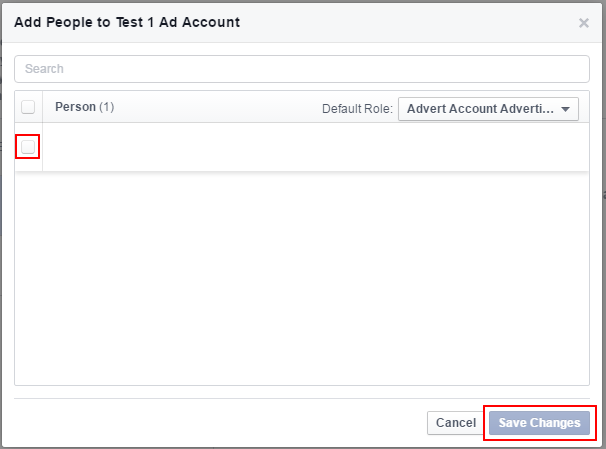
V. A new pop-up box will show and it will have your name in it. Tick that box and select “Save Changes”.
VI. Once you have saved it, you will be shown the following screen and your name will now be in the green highlighted box with your role next to it.
VII. If you go back to your Business Manager home screen and click on “Adverts Manager”.
VIII. This is your “Adverts Manager” home screen.
XI. If you click on “Tools” and then select “Pixels”.
X. The next box will pop-up asking you to accept the Terms and Conditions. Click on “Create Pixel”.
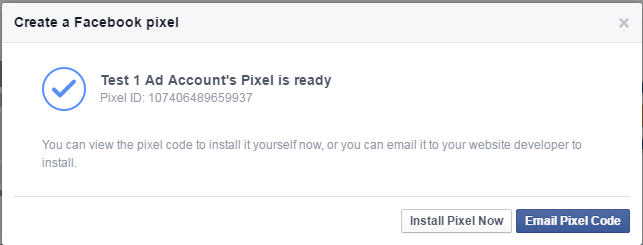
XI. The last screen shown is the one below, if you manage the website yourself then install the pixel straight away, if not then email this code to the website developer and have it added.
If you need to get back to your Pixel Code, this is possible via Tools>Pixels>Actions>View Code.
Examining the Code
At this point it might be worth briefly explaining what is happening with the code. The code is written in JavaScript. The first section makes calls to Facebook and we can ignore it.
The line that starts “fbq(‘init’, ‘10740648929997’);” initialises the Pixel and sends Facebook our unique ID to identify us as an advertiser.
The next line, “fbq(‘track’, “PageView”);” records that our page is being viewed. You will notice that when you grab the original code, there were several different events that can be recorded, the useful ones for those involved in e-Commerce are basket views and conversions, simply we just need to add in new events in the code after the page view. For example, if someone was to add an item to the cart we could record this using the following code, ” fbq(‘track’, ‘AddToCart’);”.
The code block would look like this:
fbq(‘init’, ‘10740648929997’);
fbq(‘track’, “PageView”);
fbq(‘track’, ‘AddToCart’);</script>
Conversion Tracking
The Facebook Pixel Code should be on the conversion page. So adding a conversion event it’s just the addition of a single line of code to the Facebook core code.
The conversion event for Facebook is known as a purchase. The purchase events and the add to cart events belong to the new Facebook Pixel Tracking as opposed to the old Conversion Tracking which has been phased out.
To record a conversion we implement the following event:
fbq(‘track’, ‘Purchase’, {value: ‘0.00’, currency:’GBP’});
There are two key items here, the value of the conversion shown as 0.00 and the currency. For example, the value 0.00 should be dynamically replaced with the value of the order and the GBP replaced with your currency, for example USD if you’re operating in the United States.
A completed Facebook Pixel Code to record a conversion with an order value of £10 would look like the following:
<!– Facebook Pixel Code –>
<script>!function(f,b,e,v,n,t,s){if(f.fbq)return;n=f.fbq=function(){n.callMethod?
n.callMethod.apply(n,arguments):n.queue.push(arguments)};if(!f._fbq)f._fbq=n;
n.push=n;n.loaded=!0;n.version=’2.0′;n.queue=[];t=b.createElement(e);t.async=!0;
t.src=v;s=b.getElementsByTagName(e)[0];s.parentNode.insertBefore(t,s)}(window,
document,’script’,’//connect.facebook.net/en_US/fbevents.js’);
fbq(‘init’, ‘10740648929997’);
fbq(‘track’, “PageView”);
fbq(‘track’, ‘Purchase’, {value: ‘10.00’, currency:’GBP’});
</script>
<noscript><img height=”1″ width=”1″ style=”display:none”
src=”https://www.facebook.com/tr?id=107406489659937&ev=PageView&noscript=1″
/></noscript>
<!– End Facebook Pixel Code –>
